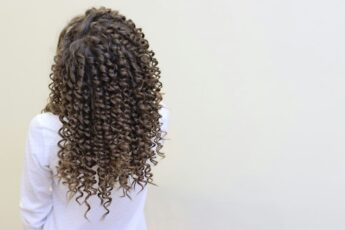
I know that a lot of you love and embrace your natural hair texture, but let’s be honest – it does feel kind of nice to be able to switch things up now and then by straightening or curling your hair. If you want to try out something new and creative, I would suggest going for those amazing mermaid waves that you can only achieve by using a three-barrel curling iron. So if you want to give yourself a mermaid-esque hairdo, this guide will help you do that by telling you how to use a three-barrel curling iron!
I do not know if you have seen a three-barrel waver before, but they can seem a bit intimidating when you first look at them. Those three large barrels attached to each other might look difficult to use, but that is not the case. In fact, there are a lot of benefits to using this type of waver instead of the regular curling iron.
Table of Contents
Why a Three-Barrel Curling Iron?
When it comes to mermaid waves, they are very difficult to achieve using a regular curling iron. However, that is not the case with the three-barrel waver which is specifically designed for this kind of wave. The waver is suitable for all hair types and lengths, it is quite quick and effective for styling hair, and it usually comes at a very affordable price.
So if this tells us anything, it is that the waver is a very good option for people who want to style their hair in less time but without compromising the look of it. Using the three-barrel waver, you will be able to achieve amazing beach waves. But before I let you go and think about purchasing one of these wavers, I would also like to tell you more about how you should use it – so here is a nice little step-by-step styling guide that you have to try out!
How to Use a Three-Barrel Curling Iron – Step-by-Step Guide
If you are new to using a three-barrel waver, you do not have to worry because it is very easy and simple. It is actually much easier to use compared to a regular curling iron, so if you know how to use that tool, you will be a real pro at using this one as well!
As I mentioned before, you can use this tool on all types of hair no matter how long, short, thick, or thin. It will help you cut down on the time you spend styling your hair while still making it look as amazing as possible. With that being said, let’s see how you should use the tool!
Step 1 – Prepare Your Hair
Before you curl your hair, you can choose to wash and dry it or just use some dry shampoo on it. Using dry shampoo is a great choice if you do not want to wash your hair that often, and it can also give your hair a ton of volume which is always great!
If you wash your hair, make sure to do so using a good shampoo and conditioner. You can also apply a bit of texturizing spray and some heat protective spray since you will be applying heat to your hair.
Step 2 – Detangle and Section
After preparing the hair with all the products that it needs, you should brush it out thoroughly and make sure there are no tangles in it. Curling will be a lot easier this way, and you will achieve better curls.
If your hair is longer or thicker, you can also section it out. This will make it easier for you to access all parts of the hair, but you can always skip the sectioning if you want to and move right on to the next step.
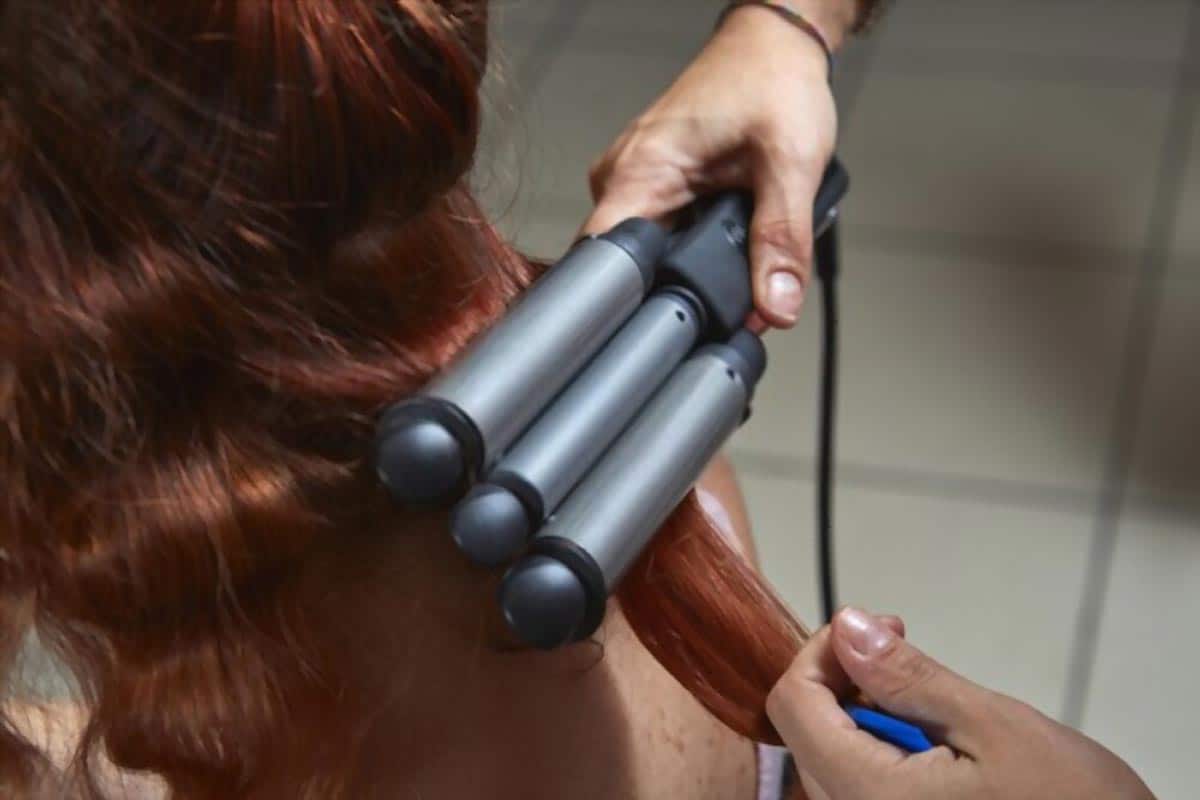
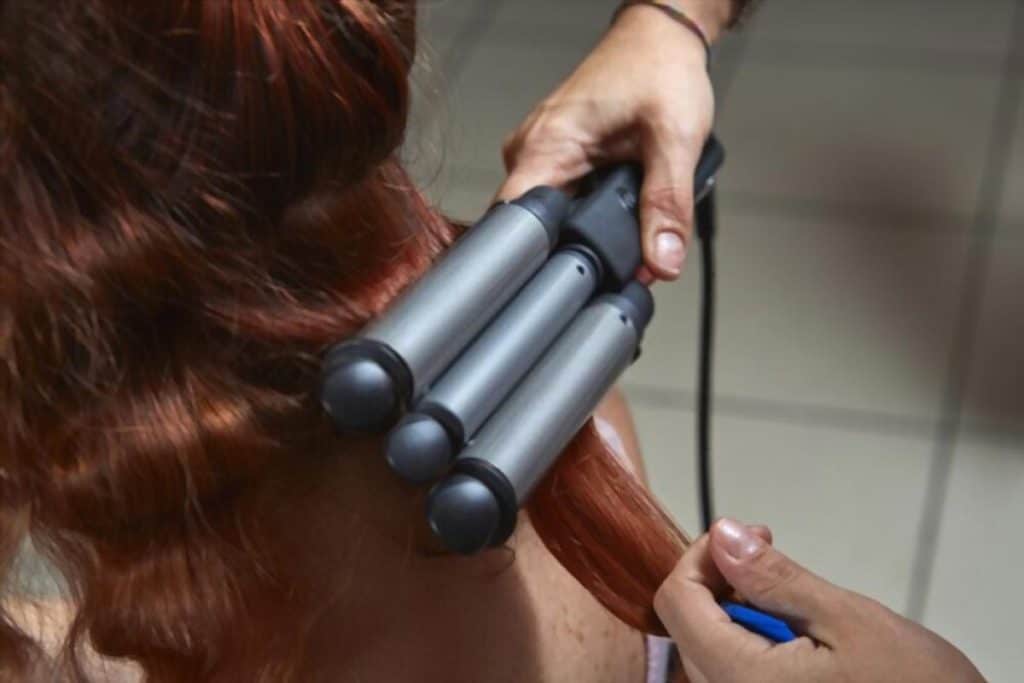
Step 3 – Use the Three-Barrel Curling Iron
When you are ready to start using the waver, you should make sure that it is horizontally positioned in your hand. When positioning it on your hair, make sure it is a couple of inches removed from the roots.
Open the clamp, position the waver on your hair strand, and then release the clamp. Hold it like that for a few seconds so that there is enough time for the wave to form. After those few seconds, open the clamp again and move it to the next section of hair you want to curl.
Be careful when positioning the waver in the hair strands because you do not want your waves to overlap. You should keep the pattern going throughout the hair strand for a better, more professional look. Repeat this part on all sections of your hair that you want to be wavy.
Step 4 – Put on the Finishing Touches
When you are done with the waver, you can apply a bit of hair spray to the hair, maybe even toss it around a bit so that the strands find a comfortable spot on your head. After that, you will be all done!

FAQs on Using a Three-Barrel Curling Iron
Before I wrap this guide up, I want to mention another piece of information regarding this great hair tool that I think you should know. Here it is:
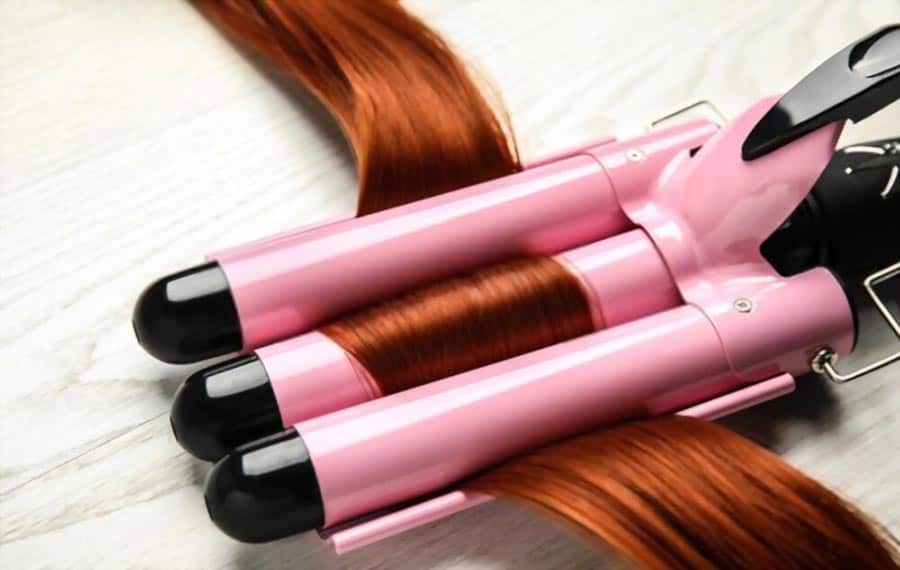
What size triple-barrel curling iron should I get?
What size triple-barrel curling iron you need depends on the type of curl you are going for. If you want to get tighter curls, you should go for smaller barrel sizes. However, if you are looking to make loose beach waves, then you will need a curling iron with larger barrels.
The ideal barrel size for this type of tool is 1 inch. With this barrel size, you can do various types of curls, so I would recommend looking into it if you are still not certain which one you should get.
That’s How You Use a Three-Barrel Curling Iron!
If you have reached the end of this guide, congrats! You now know how to use a three-barrel curling iron on your hair. I hope that this guide helped you realize the benefits of using this type of tool instead of the regular curling iron.
Let me know in the comments if you have any experience with three-barrel curling irons. I would love to know more about it!
0