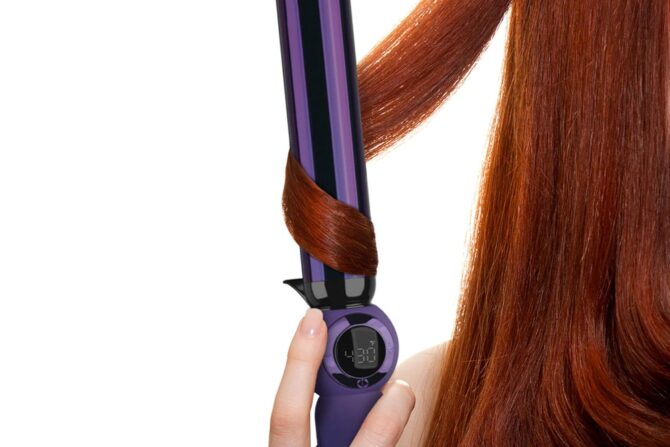
Let’s dive into the world of curling wands without clamps. If you’ve ever struggled with achieving soft, natural curls that don’t leave behind those awkward creases, a clamp-free curling wand might be just what you need. These tools will let you create bouncy, effortless curls while giving you full control over the shape and style.
It is weird to get used to holding a clamp-free wand, but after some little practice, you will be amazed! In case you don’t believe how easy this actually gets, keep reading and let me show you how it’s done. Let’s get started!
Table of Contents
Why Choose a Clamp-Free Curling Wand?
Clamp-free curling wands have become popular for a reason. They offer a variety of benefits that make styling your hair a lot more versatile and easier:
- No Creases or Lines: Unlike traditional curling irons with clamps, a wand doesn’t create any unsightly marks in your curls. This means you get soft, uniform curls every time.
- More Control: You are in control of the amount of hair to wrap and the exact tightness or looseness of the curl. This level of control will pay off in providing a more customized and natural result.
- Faster Styling: Without the clamp holding your hair, you’re able to move quicker and more smoothly, reducing the time needed for each curl.
From relaxed waves to more defined spirals, a clamp-free curling wand gives you complete freedom to create the perfect curl for whatever occasion.
Getting Started: Prepping Your Hair
It is very important to prepare your hair before starting to work with the curling wand. Here is a quick guide on how to get your hair ready for the wand:
Wash and Dry Your Hair
Clean hair is always the best basis for styling. Make sure that it is also dry, as damp hair does not hold curls too well.
Use a Heat Protector
This step is non-negotiable. Heat protectors shield your hair from further damage, making your hair healthier for longer.
Thoroughly Detangle
Use a wide-tooth comb or a detangling brush to eliminate all tangles. Smooth, non-tangled hair curls better onto the wand.
Once your hair is prepped, you are ready to proceed with curling!
Also Read: How to Use a Triple Barrel Curling Iron
Choosing the Right Curling Wand
Choosing the right curling wand makes all the difference in achieving your look. Here’s what you need to consider:
Barrel Size
- ¾ inch: Perfect for tight curls or ringlets.
- 1 inch: Classic curls or beach waves.
- 1.25 inches and above: For loose, natural waves.
Heat Settings
- Low heat (300–350°F): Best for fine or damaged hair.
- Medium heat: 350–400°F, for normal hair types.
- High heat: 400°F and above, for thick or coarse hair.
Matching the size of the barrel and temperature to your hair type is important for better results with minimal damage.
Check Out: Top 3 Best Purple Curling Iron
Step-by-Step: How to Use the Curling Wand
With your hair ready and your wand in place, let’s list the steps one by one:
1. Section Your Hair
Divide your hair into sections for easier and faster curling. This will be done from the lower layers up. Clip them so that they do not get jumbled up or in the way.
2. Hold the Wand Properly
Hold the wand downwards to wrap your hair smoothly. This position prevents any weird angles and thus provides even curls.
3. Wrapping Hair Around the Wand
Then, take a small section of hair about 1 inch wide and wrap it around the barrel, starting from the base near your roots to the ends.
Hold hair on the wand for about 5–10 seconds, depending on the heat and the type of your hair.
4. Release the Curl
Slide out the wand very gently. This allows the curl to fall completely on its own. Continue this process with each section of hair until your entire head is complete.
Consistency is key. As you practice, you’ll find your rhythm, making the process quicker and more effective.
Safety Tips to Avoid Burns
Using a curling wand without a clamp requires some extra attention to safety. Here’s how you can avoid burns:
- Wear a Heat-Resistant Glove: Most curling wands have a protective glove that comes with them. Always wear it when wrapping your hair around the wand.
- Hold the Wand Properly: Always point the wand downward and do not hold it too close to your face or neck.
- Take Your Time: Working slowly minimizes the risk of accidents. Make sure you’re fully comfortable with each section before moving on.
Safety first! A little caution goes a long way toward preventing burns.
Setting Your Curls for Longevity
Once your curls are created, you’ll want them to last as long as possible. Here’s how to lock in your style:
- Cool Down: Allow the curls to set and cool before touching or additional styling. This sets the shape of the curls well.
- Setting Spray or Hairspray: Mist your hair with a flexible hold hairspray lightly to maintain the curls intact.
- Don’t Over-Touch: Avoid combing through curls immediately. A light finger comb or soft brushing is all that’s needed to achieve a natural, full look.
By following these steps, your curls should last well throughout the day-or even longer!
Mistakes to Avoid
Here are a few common mistakes that can affect your curling wand experience:
- Skipping Heat Protectant: Not using a heat protectant is a surefire way to damage your hair. Always apply one before using heat tools.
- Wrapping Too Much Hair: Smaller sections give better control and more defined curls. Wrapping too much at once may result in uneven curls.
- Holding for Too Long: Too much heat will cause damage; keep it within the recommended 5-10 seconds per section.
- Touching Curls Too Soon: Give your curls time to cool down completely to set them.
By avoiding these common mistakes, you will have a smoother and more enjoyable experience curling your hair.
Also Read: Rotating Hair Curling Iron – A Guide to Effortless Curls
Best Curling Wands To Try Now
Remington Shine Therapy Curling Wand
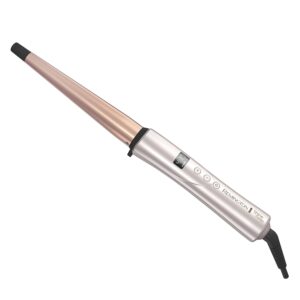
The Remington Shine Therapy Curling Wand is specially made to produce smooth, lustrous curls with protection from damage caused by excessive heat. With its ceramic barrel infused with antioxidant-rich Argan Oil and protein-rich Keratin, the distribution of heat becomes smooth and evenly regulated for the most excellent finish. It’s the ideal wand for achieving shiny, healthy-looking curls without fuss.
Key Features
- CERAMIC INFUSION TECHNOLOGY: Infused with Argan Oil and Keratin for even heat distribution.
- 30-SECOND HEAT UP: Rapid and efficient styling without wasting valuable time.
- 10 DIGITAL HEAT SETTINGS WITH TEMPERATURE LOCK: Customize to your hair type for perfect, damage-free style setting (250°F – 410°F).
- AUTO SHUT-OFF: Peace of mind from automatic shut off after extended use.
Pros
- Provides sleek and shiny curls
- Heat settings are customizable for different types of hair
- Heat protective glove included
- Heats up fast
Cons
- Can be bulky for some users
- Slightly expensive compared to basic models
Bed Head Rough Volume Curling Wand
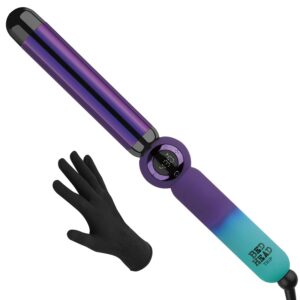
Experience bold, voluminous curls without hassle with the Bed Head Rough Volume Curling Wand. With a clamp-free design, this advanced shine master plated technology gives effortless waves and textured curls with this wand.
Key Features
- ROUGH VOLUME: For fast heating with huge shine to tousled curls and waves.
- ADVANCED CLAMP-FREE DESIGN: Style your hair easily with no hair damage.
- MULTIPLE TEMPERATURES: Up to 430°F for versatile styling.
- TRAVEL READY: With dual voltage plus auto shut-off for added safety and convenience.
Pros
- Easy to use, clamp-free design
- Provides well-defined, long-lasting curls
- Heat adjustable for all types of hair
- Travel-friendly, lightweight
Cons
- May be too large for shorter hair
- Bright colors may not be everyone’s taste
Conair Double Ceramic Curling Wand
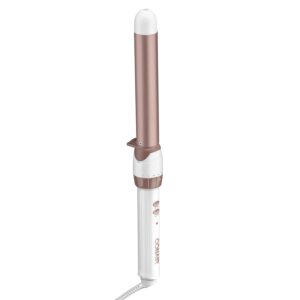
For natural, flowing waves, look to the Conair Double Ceramic Curling Wand. Its unique conical barrel and high-quality ceramic technological design provide even heat distribution and set for long-lasting curls with minimal frizz.
Key Features
- DOUBLE CERAMIC: For quick heat-up and reduced damage with even heat distribution.
- CLAMP-FREE WAVES: Easy styling without kinks or creases.
- MULTIPLE HEAT SETTINGS: Up to 400°F with Turbo Heat boost for difficult sections.
- INNOVATIVE DESIGN: Includes cool tip for easy handling and auto shut-off for safety.
Pros
- Ease of use, clamp free design
- For all types of hair
- Turbo heat for problematic parts
- Travel-friendly with dual voltage
Cons
- Some users may find the size too small for larger curls
- Design might feel a bit basic for advanced users
Conclusion
Mastering a clamp-free curling wand does take a little practice, but once you do, you’ll love the flexibility and control it offers. You can create everything from soft waves to more defined curls-whatever your heart desires.
So go ahead, experiment, enjoy, and share your experiences with me! I’d love to hear how your curls turn out.
Frequently Asked Questions
What’s the difference between a curling wand and a curling iron?
The curling wand has no clamp, meaning you can only wrap hair around the barrel. While in the case of a curling iron, it uses a clamp to hold the hair in its place.
Is it possible to use a curling wand without heat protectant?
Technically, yes, but that’s quite dangerous. Heat protector works for the security of your hair in cases of frequent heat styling.
How do I get tighter or looser curls with a clamp-free wand?
Use smaller sections and higher heat for tighter curls, and larger sections with lower heat for looser waves.
Are clamp-free curling wands safe for beginners?
Yes! They just take a bit of practice. Using a heat-resistant glove can help beginners stay safe while styling.

