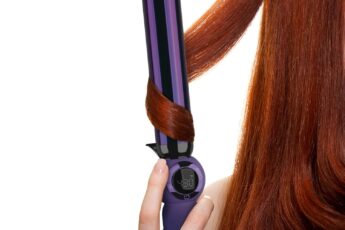
Let me be honest with you—I used to live by my flat iron. It was practically glued to my hand. Curls? Blowouts? Sleek straight strands? All of it came with heat. I didn’t think much of it at the time. That little sizzle noise? Just meant it was “working.” Or so I thought.
But then the breakage started. My ends split faster than I could trim them. My hair felt dry, stiff, and thin. I kept trying new conditioners and oils, but nothing helped for long. That’s when it hit me—maybe it wasn’t the products. Maybe it was the heat.
That was the turning point. I made the switch to low-heat styling methods. And honestly? My hair has never looked or felt better.
Let me walk you through what worked, what didn’t, and what you can try—especially if you’re just starting to ease off the heat tools.
Table of Contents
Why I Switched to Low-Heat Styling
I didn’t go into this with a master plan. I just got tired of watching my hair fall apart. You know that feeling when your brush pulls out a chunk of strands and your stomach drops? That was me. Too often.
At first, I tried cutting back—maybe using heat just twice a week instead of every day. But the damage didn’t stop. So I went cold turkey. It wasn’t easy.
I won’t pretend I didn’t feel a little lost. Styling my hair without my favorite tools felt awkward. Like learning to walk again. But I stuck with it. And over time, I started noticing small wins.
My hair stopped snapping off. It held moisture better. And the shine came back. Not overnight, but it came.
Low-Heat Doesn’t Mean No Style
There’s a big myth floating around: that if you don’t use heat, you can’t have styled hair. That your only option is a boring ponytail or leaving it messy.
That’s not true.
You can still add shape, texture, volume—even curls. It just takes a different approach. Think more patience, less heat. More gentle techniques, less damage.
And once you find what works for your hair, you’ll realize it’s not limiting at all. In fact, it’s freeing. You’re not tied to a hot tool or stuck waiting for it to cool down.
Check Out: How to Fix Hair Dye Disasters at Home
Low-Heat Styling Methods You Can Try
Let me show you a few low-heat methods I’ve actually used—and that you can try starting tonight. They’re simple, don’t require a ton of effort, and they really do work.
1. Overnight Braids or Twists
This one’s a classic for a reason. It gives you soft, natural waves without doing much at all.
- Wash or lightly dampen your hair
- Section it into two or more parts
- Braid or twist each section
- Sleep on it and take them out in the morning
The more braids, the tighter the wave. I usually go with two for loose waves. You can even add a bit of mousse if your hair struggles to hold a shape.
2. Flexi Rods or Foam Rollers
If you want curls but don’t want to deal with heat, this is your friend.
- Start with damp, detangled hair
- Roll each section with a flexi rod or foam curler
- Let it dry naturally or sleep on it
I like flexi rods because they’re comfortable and give a nice bounce. You can adjust the size of the curl depending on how thick the section is.
3. The Headband Curl Hack
You’ve probably seen this one online. It works, and it’s easy.
- Place a stretchy headband over your head like a crown
- Take sections of your hair and wrap them around the band
- Sleep on it or leave it in for a few hours
In the morning, you’ll have soft curls with almost no effort. It’s one of my favorites on lazy days.
4. The Sock Bun for Curls
I was skeptical about this one, but it surprised me.
- Use a clean sock and roll it into a doughnut shape
- Pull your slightly damp hair into a ponytail
- Roll your hair around the sock into a bun
- Leave overnight or for a few hours
This gives you big, voluminous curls—almost like a blowout, minus the heat.
5. Cool Shot Styling (Low Heat Blow-Dry)
Okay, this is technically not zero heat, but it’s low enough that it doesn’t fry your hair.
- Use the cool setting on your blow dryer
- Add a diffuser if you have curls
- Use a styling cream or mousse to shape
It gives a soft, dry finish without the harsh heat. Perfect for those days when you’re in a rush but don’t want to skip all styling.
6. Pin Curls
These take a little more time, but they look so pretty.
- Divide damp hair into small sections
- Roll each section into a curl and pin it flat to your head
- Let it air-dry or sleep on it
- Unpin and fluff in the morning
It gives a vintage curl vibe and lasts longer than most styles if you don’t touch it too much.
7. Loose Buns or Braided Buns
This one’s good if you like volume and texture without defined curls.
- Pull damp hair into a loose bun or braid it and then twist into a bun
- Let it dry while you do other things or sleep on it
- Take it out, shake your roots a bit, and you’re good to go
This one gives a relaxed, soft wave and adds body without needing any products.
Tips to Make Low-Heat Styles Work Better
If you’ve never tried these before, here are a few things I learned the hard way:
- Use styling products – A little mousse or curl cream makes a big difference
- Don’t start with soaking wet hair – Damp works best; it holds shape without stretching too long to dry
- Prep your hair well – Always detangle first, and maybe use a light leave-in conditioner
- Wrap your hair in satin or silk – Whether it’s a scarf, bonnet, or pillowcase, it helps prevent frizz and keeps the style fresh
Also Read: The Truth About the Rarest Hair Type (And How to Care for It Naturally)
What to Expect When You Switch
Switching from heat to low-heat isn’t always smooth. Your hair will go through a bit of an adjustment period. You might try a style and wake up with frizz or flat roots. That’s okay.
Give it time. Try different methods. Mix and match. What works for my hair might not work for yours, and that’s completely fine.
The important part is that your hair starts to feel healthier. You’ll notice less breakage, softer strands, and more natural shine over time.
My Go-To Low-Heat Routine
On a regular weeknight, here’s what I do:
- Wash and lightly towel-dry my hair
- Apply a leave-in conditioner and mousse
- Section it into two parts and do two loose braids
- Sleep on it
In the morning:
- I take the braids out, run my fingers through
- Add a drop of oil if needed for frizz
- Pull a few strands behind my ears or pin one side back
That’s it. No tools, no damage. And it lasts a couple of days unless it’s super humid.
When to Use Heat Sparingly (And How to Be Safe)
Look, I’m not here to say you can never use heat again. Sometimes you want a sleek look or have a special event. That’s fine.
If you do use heat:
- Use a good heat protectant
- Never apply heat to wet or damp hair
- Keep the temperature below 300°F
- Don’t go over the same section more than once
And maybe limit it to once or twice a month if you can.
You Can Also Read: How to Style My Short Hair
Conclusion
You don’t have to give up on styling just because you’re giving up the heat. You just need new tools. A braid, a soft roller, a little patience.
Once I let go of the heat, I started actually enjoying my hair again. It wasn’t fried or dull or breaking. It just felt like mine. Healthy, soft, and strong.
If you’ve been thinking about making the switch, this is your sign. Try one of these styles tonight. Just one. See how it feels. You might never go back.
Frequently Asked Questions
Do low-heat styles last as long as heat-styled ones?
Sometimes, yes. If you prep properly and avoid humidity, they can last two to three days. Some methods like pin curls even last longer.
Can I do these if I have short hair?
Absolutely. Headband curls, pin curls, and even tiny braids work great on shorter styles—you just have to work with smaller sections.
What products work best with low-heat styles?
Go for lightweight mousse, curl cream, leave-in conditioner, and a light oil. You don’t need much—just enough to hold the shape.
How long does it take to see healthier hair after quitting heat?
You’ll likely feel a difference in a few weeks. But real recovery—stronger strands, fewer split ends—can take a couple of months depending on how much damage there was.